Update page guide
Overview
The Update page is where you build and preview SKU or barcode changes before applying them to your selected products. On this page, Update mode is the default view. If you want to switch to formatting existing values instead, use Format mode.
The page is divided into three main areas, matching the visual layout you see on screen:
Top preview area: shows how your setup will look on sample products.
Middle combo box area: where you build the parts of the final SKU or barcode.
Bottom update settings area: where you choose SKU or barcode options, mode settings, examples, presets, and toolbox controls.
Video Overview
Top: Previewer
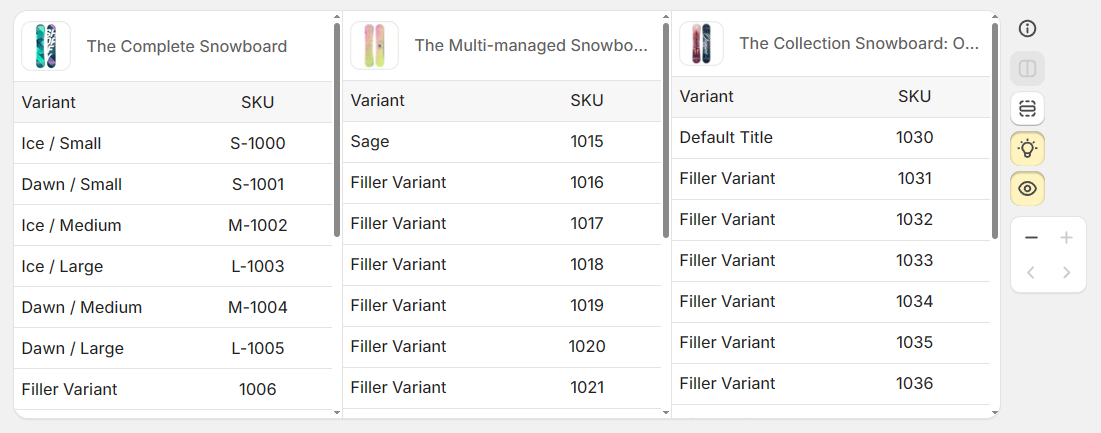
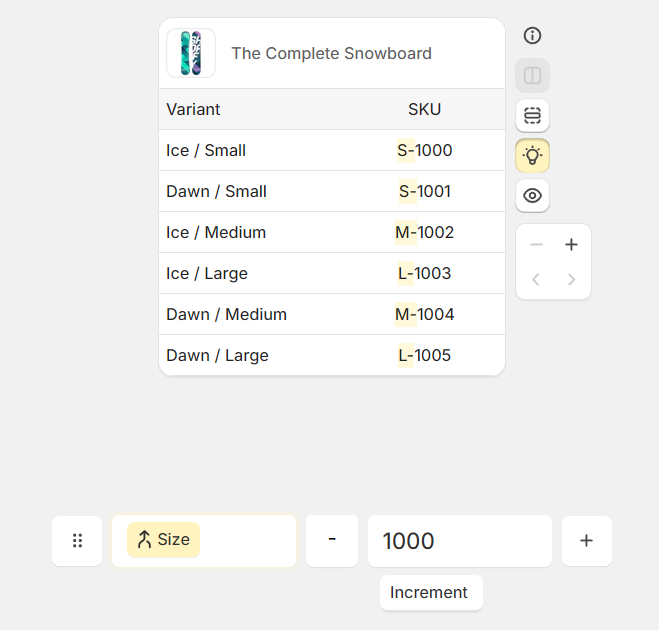
The top area shows a preview of your current setup. It helps you confirm that your combo boxes are in the right order and producing the result you expect before you apply changes.
Incremented values may differ slightly from the actual output because the preview is generated using a randomly selected product.
What the preview shows
Sample products from your selection: the preview is based on sampled products, not every product in your batch.
Up to 3 products side by side: you can compare how the same setup behaves across multiple products at once.
Highlighted output: when you click a combo box, the matching section in the preview is highlighted so you can see exactly what that box contributes.
Filler rows: the preview can show filler rows when needed, up to 15 rows. Useful if there aren't many variants on displaying product.
Use the preview to check spacing, separators, numbering, and box order before running your update. It is the fastest way to catch small formatting issues early.
Middle: Combo boxes
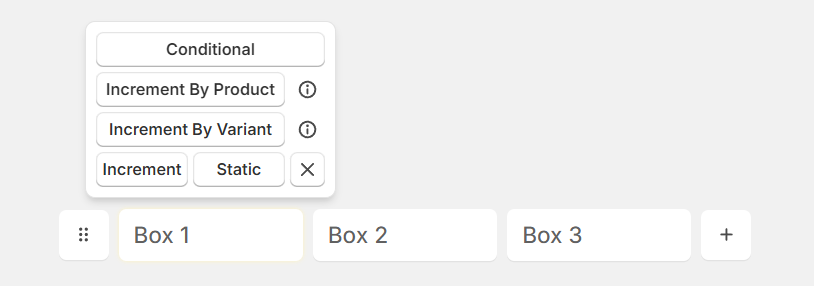
The middle area is where you build the final SKU or barcode. Each combo box adds one part of the finished value, such as a product attribute, a fixed text value, or an incrementing number.
You can use up to 7 combo boxes on the page.

Rearrange combo boxes
Use the button on the far left of the combo box row to enter rearranging mode. This lets you change the order of the boxes so your final SKU or barcode is built in the sequence you want.
Add combo boxes
Use the + button on the right side of the row to add another combo box. You can keep adding boxes until you reach the 7-box limit.
Choose a combo mode
Select a combo box to open its available modes above the row. These modes control what that box contributes to the final SKU or barcode.
For a full explanation of each mode, see Combo modes.
Use separators without spending a combo box
If you only need a separator such as - or /, you do not need to use a full combo box for it.
Enable separator boxes in the toolbox.
Enter the separator in the small input boxes between combo boxes.
Use this to save your combo boxes for values that change.
Separators can be any string up to 3 characters long.
Separator boxes are enabled in the toolbox and then entered in the small input boxes between your combo boxes.
Bottom: Settings and tools
The bottom area contains the settings and tools that control what you are updating and how the update behaves.
Choose what to update
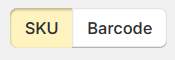
Use the selector to choose whether you want to update SKU values or Barcode values.
Mode options
Update mode: the default mode on this page, used to build new values from your selected boxes and settings.
Format mode: use Format mode if you want to reformat existing SKUs instead of building updated values on this page.
Examples, and Toolbox
Examples: review sample outcomes while building your setup.
Toolbox: enable additional helpers such as separator boxes and presets.
If you use the same box layout regularly, save it as a preset so you can apply the same structure again without rebuilding it from scratch.
Presets can be reused, which is especially helpful when products are regularly added to your store.
Recommended workflow
In the bottom update settings area, decide whether you are updating SKU values or barcode values.
Add up to 7 combo boxes, choose the right mode for each one, and arrange them in the order you want. Utilise Separators if needed.
Review the live preview, compare up to 3 products side by side, and confirm highlighted output for each box.
If this setup is something you will use again, save it so you can reuse it later.